Need An Accurate Estimate For Your Sitecore XM Cloud Migration Project? Kickstart Your Journey Here!
Get My EstimateIn this guide, we will explore how to utilize the Sitecore task scheduler along with a PowerShell script. Specifically, we will focus on an example where we need to unpublish certain Sitecore items based on predetermined dates and times. By configuring the Sitecore scheduler, we can ensure that our PowerShell script executes at specific intervals, enabling us to effectively accomplish the task at hand.
Step 1: Creating the PowerShell Script
Let's assume we have a requirement where we need to remove events from the event list once their session date has passed. To achieve this, we can create a PowerShell script with the following logic.
In the PowerShell script, we will utilize the Event session template.

Navigate to the Sitecore Launchpad and locate PowerShell ISE, or alternatively, go to the Desktop and access Sitecore -> Development Tools -> Sitecore ISE. This will open the Integrated Scripting Environment (ISE) specifically designed for PowerShell scripting within Sitecore.
Within the Sitecore ISE, you can proceed to write your PowerShell scripts and thoroughly test their functionality to ensure they perform as intended.
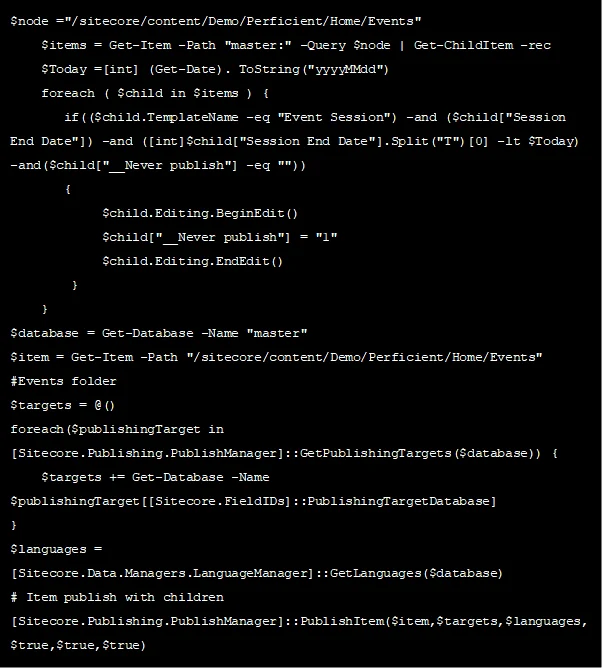
Feel free to modify the PowerShell script according to your specific requirements. Customizing the script will allow you to tailor its functionality to meet your desired outcome.
Step 2: Saving the Script
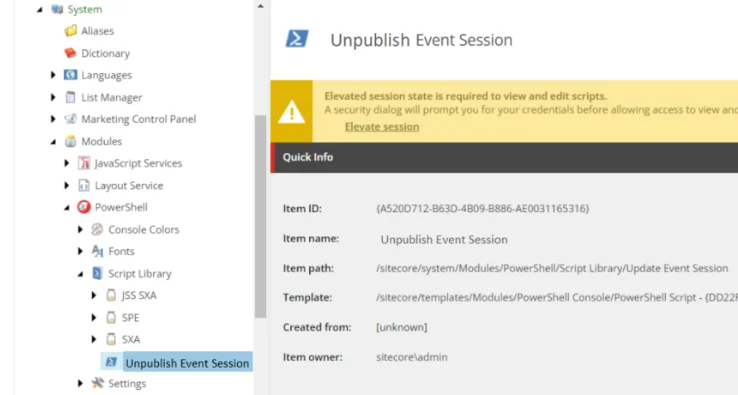
Save the PowerShell script with the name "Unpublish Event Session" and store it within the content tree. Place it under the path "/sitecore/system/Modules/PowerShell/Script Library" for easy accessibility and organization.
Step 3: Creating a Scheduler
To begin creating a scheduler, navigate to the Scheduler path within Sitecore by accessing "/sitecore/system/Tasks/Schedules". Right-click on the "Schedules" folder and select the "PowerShell Scripted Task Scheduler" option from the insert menu. Alternatively, you can choose the "Schedule" option, but for this scenario, we will specifically select the "PowerShell Scripted Task Scheduler" to configure our PowerShell script execution.
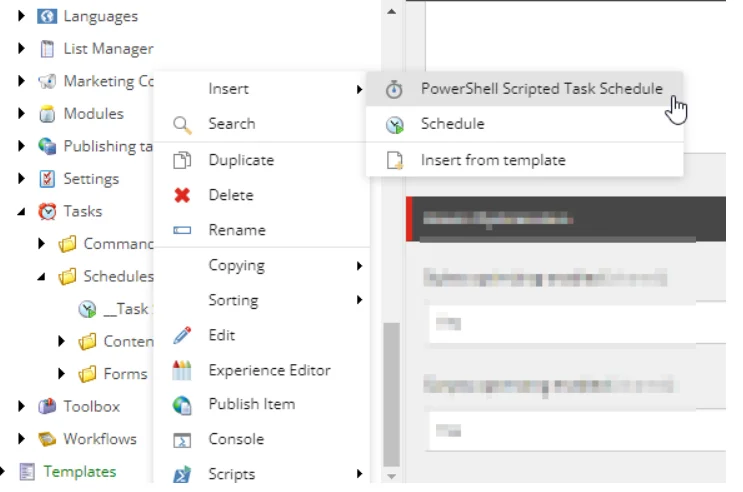
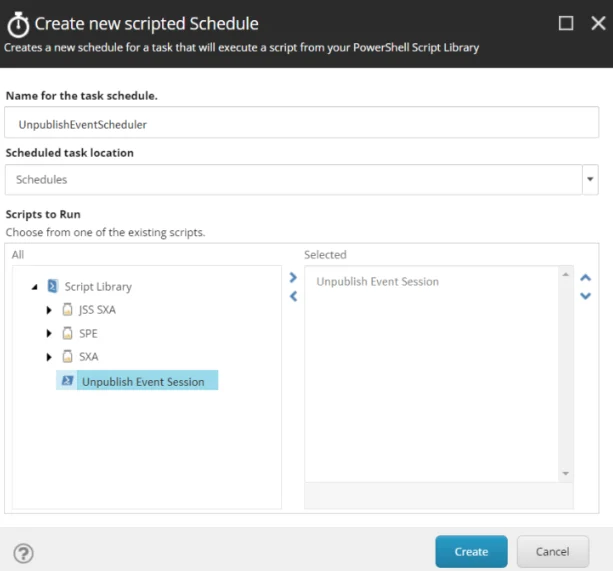
This action will open the "Create New Scripted Schedule" window. Proceed to provide a suitable name for the task schedule, such as "UnpublishEventScheduler." Select the appropriate location for the schedule. Choose the previously created script from the list of available scripts. Finally, click on the "Create" button to finalize the creation of the scheduled task.
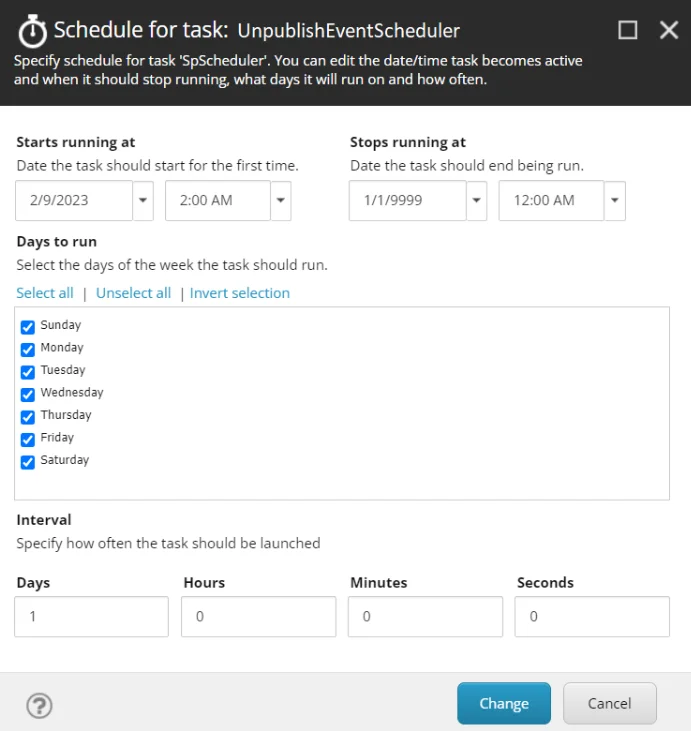
In the "Schedule for task: UnpublishEventScheduler" popup window, enter the required information based on your specific needs. Customize the fields as necessary, and once you have entered all the relevant details, click on the "Change" button to save the changes.
A scheduler named “UnpublishEventScheduler” is created and can be found at "/sitecore/system/Tasks/Schedules/UnpublishEventScheduler".
If you need to update or modify the scheduler, you can right-click on the Schedule item (UnpublishEventScheduler) and navigate to the Scripts section. From there, select "Edit Task Schedule" to open a dialog where you can make the desired changes to the scheduled task.
In case you want to manually execute the task, simply choose "Run Task Schedule" to initiate the execution of the scheduled task without waiting for the predefined schedule.
Want to improve your Sitecore platform? Get a free audit now!

 About Us
 Careers
Hiring
 Our Story
 Let’s talk


