Need An Accurate Estimate For Your Sitecore XM Cloud Migration Project? Kickstart Your Journey Here!
Get My EstimateIn Sitecore XM Cloud, managing users and their access rights is crucial for effective collaboration and secure data handling.
Whether you are a developer, content editor, or administrator, understanding how to create users and modify their access levels ensures smooth operations within your Sitecore environment.
First, When you open the admin portal of the Sitecore XM cloud you can see the dashboard as shown below,
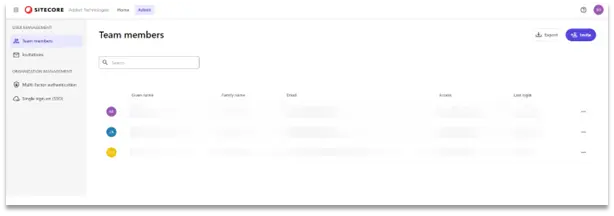
(Sitecore XmCloud Dash-Board)
To manage the flow of user or provide or remove any access over the users, you must need to be admin access of the portal.
Now if you wanted to add a user to a team, you can invite them by using the invite button present over the top right corner.

(Invite Button for the User)
Now going forward, you need to provide few details of user, Like Email address and what kind of access you want to provide and on which Product/App(like XM-Cloud, CDP, Send etc.) you wanted to consider.
Before diving into user creation and access modification, let’s take a look at the key user roles in Sitecore XM Cloud:
- Administrator: Has full control over the Sitecore instance, including user management, content editing, and configuration changes.
- User: we can consider this as a content Author/Editor, Responsible for creating and managing content within the Sitecore content tree. They may have limited access to certain administrative features.
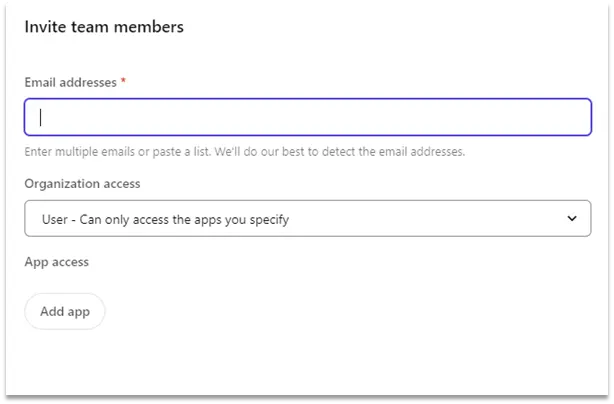
(Fields for the User configuration)
Now, when you provide the above details, the mentioned email will receive a mail where the team member needs to accept the Invite and after that, that user can now access the portal with their credentials.
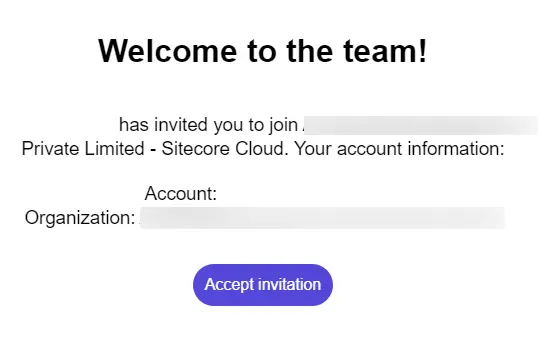
(Invitation Mail)
Now going forward if admin wanted to change or remove the access of the previously available use then, Admin can see the details of the present user and can modify the same on the below dashboard.
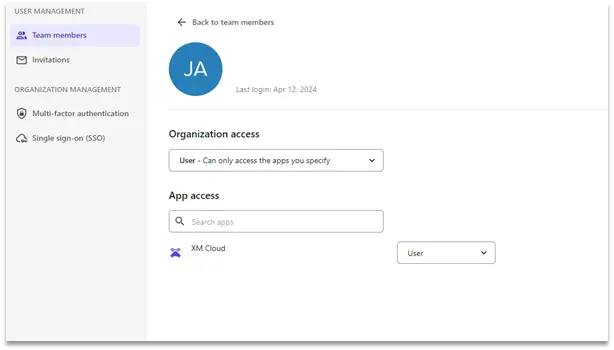
(User details and Modification window)
Where all the details can be configurable, like user or admin access then the product or app details. That’s how you can invite and provide the access to the outsider on the Sitecore XM cloud portal.
User management in Sitecore XM Cloud is a fundamental aspect of maintaining a secure and efficient digital experience platform. By following this guide, you can confidently create users, assign roles, and modify access levels to accommodate the diverse needs of your organization.
Want to improve your Sitecore platform? Get a free audit now!

 About Us
 Careers
Hiring
 Our Story
 Let’s talk


